Steps to create an image like “The Observer”
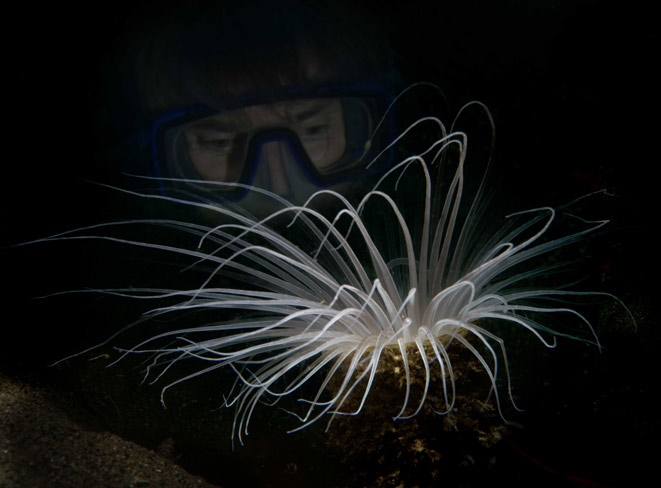
Steps to create an image like “The Observer”
Here is an easy quickie that anyone can do with any post editing program that allows putting two photos together.


The amount of my face that shows through will vary with the viewing system you have. It appears a little too dark on some systems.
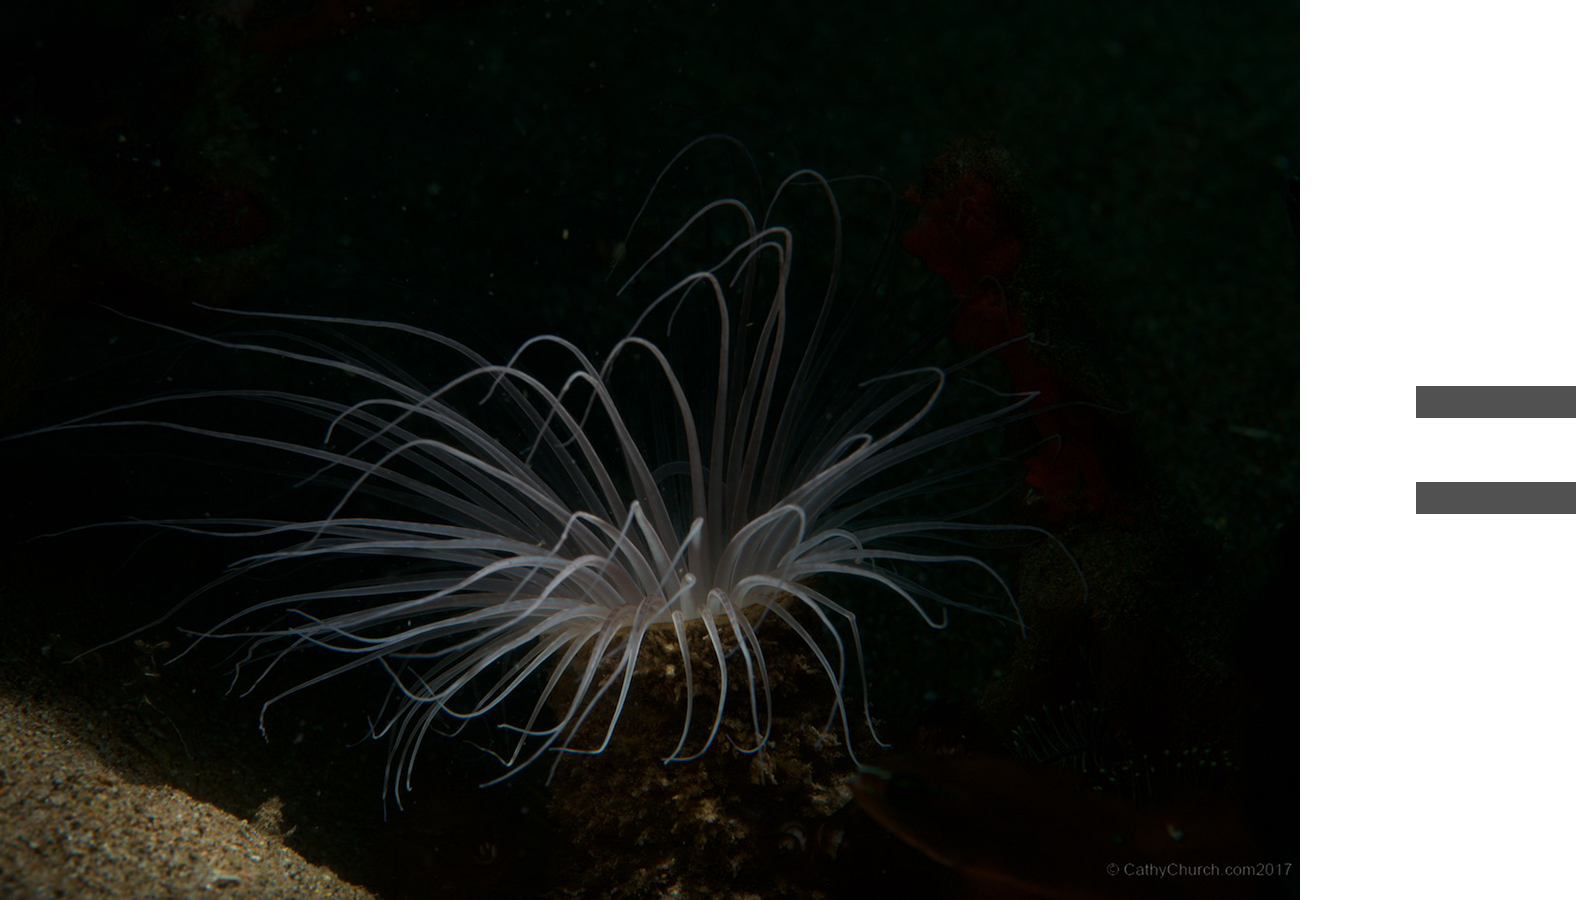
1. Choose a primary photo that you like a lot, but that may be improved by adding a secondary subject. Here is an underexposed photo of a lovely (“Cerianthus sp”) tube anemone in the Philippines. I was using a strobe with a snoot that narrowed the beam to just hit the anemone and left the surroundings nice and dark.
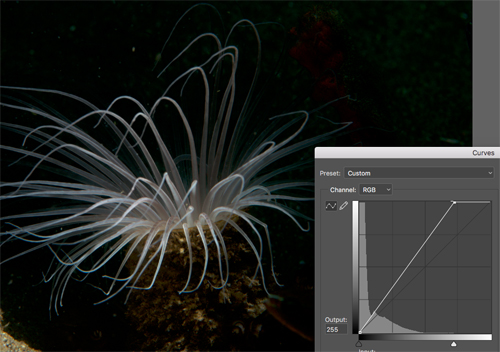
I opened the photo in photoshop and used curves as shown on the right to lighten the anemone without making the darks brighter. Notice that the slider on the right has moved considerably to the left, but the slider at the black side is not moved.
(You do not have to use adjustment layers if you want to keep your work simple. But you must be sure that like each step before you move on. If you do ten more steps and then want to change this step you will have to go back and repeat all of the subsequent steps. But this is a description of a quickie—not a complex project, and I find this system works so easily, as long as I do it small acceptable increments.)
Working within a dark background makes it simple to add any other subject that is also surrounded by dark. In my case, my dark hair and dark mask qualified this image as a quickie! So take that into consideration as you look for images that have compatible backgrounds.
2. As I studied the anemone photo, I thought it would look cool with a large, mysterious face looming over it. I found the perfect one, taken by my good friend Martha Watkins-Gilkes in the Solomon Islands. Search your files for something to add to your primary photo — like a barracuda with his mouth open–whatever you would like to include with your primary scene.
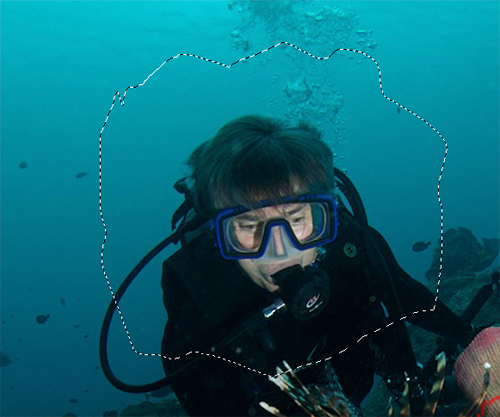
Open this second photo in photoshop and use the lasso tool to make a rough circle or shape around the part you want to include in your scene. Leave enough room around the selection so that your soft brush has room to make a gradient that blends without a noticeable line.
Make a copy of the selection (command C on the mac, control C on a PC) and switch back to the window with your primary background.
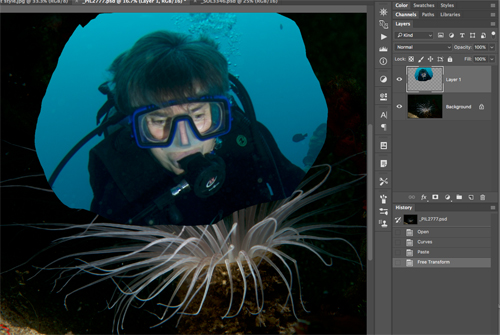
3. With your cursor on your primary image, just hit “Paste”(Command V on the mac and control V on a PC). The piece your cut out will appear in a new layer. Note on the right here the top layer showing the diver segment only. Make sure that you have that layer activated in order to work on the top layer.
Use your move tool (V) to place it where you want it, and use Free Transform (command T) to size it. Double click out of Transform when you like it. You can go in and out of Transform as often as you like.
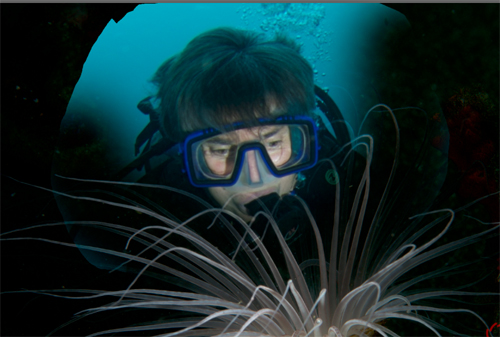
4. Use an eraser brush (touch E on your keyboard) with a soft edge and start erasing closer and closer to the part of the subject you want showing. The larger the brush, the larger the blending areas, so you may need to switch to a smaller brush to work around smaller details.
If you erase too far, go to “Window” and turn on the “History” panel. Then just click backwards until you get to the last step where you liked the effect and then start again. The later steps will be automatically erased.
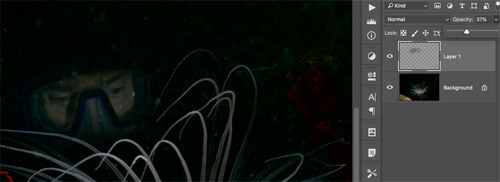
5. The magical part of this particular quickie is in using the opacity slider to give the face a more ghostly appearance. The layer for the face is on top of the layer for the anemone, but you see the anemone right through the face when I make the face more transparent.
Note the opacity slider in the upper right above the layer 1. It is currently set for 37%. The more opacity I set it for, the brighter the face will show up in the background.
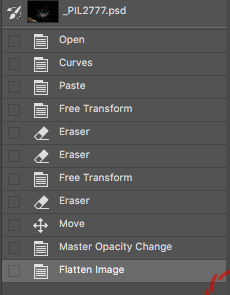
6. Here is the summary of the steps I needed for this very simple procedure that will provide you with an infinite array of possibilities without having to know much more at all about photoshop. The steps I performed on the image of my face do not show up in this history, but that is what is being pasted in the third step.
Save the image as a PSD so you can continue to make changes in the future, and then flatten the image, and use the “save as” command to also save it as a jpeg to post to facebook, or add to your own website.
So there you have a complete description of how I made a ghost behind my tube anemone, that I call “The Observer.”
